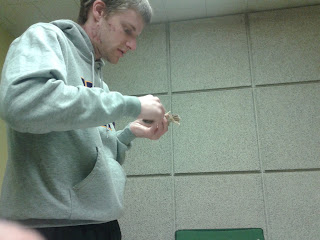
After a long break of not meeting, we finally managed to meet up with Danny to continue our lesson on oboe reeds. He showed us how to go through the process of the first scrape.
(The Blank and the Knife)
To begin you work out the tip by scraping to the corners of the reed at a diagonal using a razor blade. The bottom of the tip scrape should come to a measure of 66mm. Make sure that the tip is as thin as possible since it will be clipped later on.
Next, THE HEART! The heart is the hardest part of the reed and its placement is indicated below. A heavy heart is difficult to play but gives the reed a richer sound, while a heart that is too light vibrates too much and produces an immature "buzzy" sound.
Some people wait to put in the windows, but there is no reason for this so you should just go for it! To create the windows use long strokes with the razor blade starting a few millimeters above the bottom and scrape upwards. It will take about 10 strokes per window. There should be two windows to each side with a "spine"in between. The windows help to close the reed so that the entire reed can vibrate, not just the tip. The tone then takes on a warmer and darker sound.
RANDOM FACTS ABOUT REED MAKING!
1. Take cane off flattens the reed, while cutting the tip makes is sharper.
2. You can fix hitches by scraping at alternating left and right angles rather than solely upwards.
3. Make sure scrapings are equal on both sides.
4. Reed making is the Anti-Rikkers; IT'S ALL ABOUT SYMMETRY
5. If it sounds buzzy when you play the reed take off more cane.
And now back to the first scrape!
Before opening up the tip, hold the reed under the light and check for smoothness, darker sections and the "V" on the tip to make sure the reed is ready to move onto detailing.
The First Cut!! Get your handy-dandy cutting stone and your weapon of choice (which should be a razor blade, but we won't judge you). Place the tip of the reed on the cutting stone and take off "a sizable chunk". Take note: a sizable chunk should only be about 1 millimeter. You can use the "pop" test to make sure the reed is still sealed.
Plaque - It's not just for your teeth anymore! You can use a Flat Plaque or a Contoured Plaque but the Contoured Plaque sometimes opens up the reed too much and breaks the seal. You insert the plaque into the tip of the reed which allows for more detailed work.
Once you have detailed the reed it is time to test it out. Placing the reed in your mouth form a normal oboe embouchure and check for the "Buzz" and the "Crow". You make the crow by placing the reed, up to the string, into your mouth and playing. You should hear double octave C's, if the reed is in tune. Check with a tuner and scrape or cut as needed. At this point you are ready to try it on the oboe and cater it to your personal needs. Do not finish the reed in this sitting! Cane changes daily and you should leave it a little rough so you can come back to finish it tomorrow.


